Sunday, January 31, 2010

Refrigerator Yeast Rolls

Last week was one of the BUSIEST weeks of grad school so far. I had 3 homework assignments to do, an exam to take, and a paper to write. I managed to get it all done, BUT unfortunately I wasn’t able to cook for the family like I normally do. And the saddest part…I wasn’t able to blog!!!

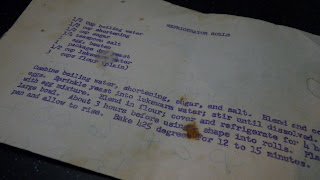
A couple of weeks ago, my mom gave me this recipe for Refrigerator Rolls. She received this recipe in home economics class in high school...that would be about 30-something years ago. You can tell from the picture that the recipe has been used!  She said she used to make these rolls all the time. I decided to try them, and I really enjoyed them. She recommended rolling the dough into small balls and using a muffin tin to bake them in. I put three balls in each one, which made for some nice looking rolls! These rolls are pretty dense, not light and fluffy as I was expecting them to be, but the flavor is great!

Refrigerator Rolls

½ cup boiling water
½ cup shortening
½ cup sugar
¾ teaspoon salt
1 egg, beaten
1 package dry yeast
½ cup lukewarm water
3 cups all-purpose flour

1. Combine boiling water, shortening, sugar, and salt. Blend well and cool. (I combine in same pot that I boil the water).
2. Add egg.
3. In large bowl, sprinkle yeast into lukewarm water and stir until dissolved.
4. Add egg mixture.
5. Blend in flour. Cover and refrigerate for 4 hours.
6. Shape into rolls or small balls as described above. Place on greased pan (or muffin pan) and let rise for about 3 hours in a warm location.
7. Bake at 425 degrees for 10-12 minutes. (The directions say to bake for 12-15 minutes, but I found that this was too long).

Wednesday, January 20, 2010

Gadget of the Week: Rotisserie/Convection Oven


This rotisserie/convection oven is a great gadget to have in the kitchen. It does take up counter space, but luckily I have an unused corner that I could put it in. The one I have is made by Euro Pro. It was a gift from my father-in-law, but from my research, they run somewhere around $100. This is something I would have never purchased myself, but I’m very glad that I have one now!! So, what are the pros and cons of this gadget? Here you go…

Pros:

  1. The rotisserie function is awesome. The chicken is so moist and juicy and full of flavor! We simply sprinkled some Creole seasoning on the chicken before cooking. That’s all it needed!
  2. The oven function is wonderful. You have 2 bake racks, so you can fit about 8 pork chops in it. Again, they are very moist and juicy! Actually nothing that I’ve baked in this oven has been even the least bit dry!
  3. It has a lot of settings which include warm, bake, broil, toast, and of course convection and rotisserie. I’ve also heard they bake cakes very well, but I haven’t tried this yet!
  4. There is a crumb tray at the bottom as well as a basking tray. Between those two trays, all of the grease or crumbs are caught and it makes clean-up super easy!
  5. Did I mention that clean-up is super easy!?
  6. It has a 60 minute timer and also has a stay-on mode. (I usually use the stay-on mode).
Cons:

  1. It gets very hot! The handle stays pretty cool, but the rest of the oven it too hot to touch. I always make sure I don’t have anything on it or close to it.
  2. The words around the dials are very hard to read. This seems to be a common complaint about this oven, from the research I’ve done. I have to get pretty close to it to read it, and I don’t have vision problems at all. It would probably be very hard for someone with vision problems to read.
  3. It’s definitely bigger than a regular toaster! It does take up a more counter space, but it’s not so big that you can’t leave it on the counter all the time.
OVERALL, I think this oven is a great buy. It works great for us when I’m cooking things like pork chops or chicken and we have a family of 5. Instead of having to fire up the big oven, this oven can be used to save on electricity! Another way to be green!

Crock Pot Roast

This is my favorite way to cook a roast, and it’s in the crock pot, so that’s even better! You can prepare it in about 5 minutes and then leave it to cook all day. It’s so tender and perfect served over rice or mashed potatoes! Sometimes I throw in some potatoes (chopped) a couple of hours before serving. Good stuff!

I apologize for not getting any plated photos of this dish...everyone was so eager to eat, and we didn't have any leftovers!

Crock Pot Roast

2-3 pound roast (I used round roast this time but my favorite roast to use is chuck)
1 onion
1 package onion mushroom soup mix (I used Lipton brand)
1 (10.5 ounce) can cream of mushroom soup
1 ½ cup water

1. Place roast in crock pot.
2. Chop onion and place in crop pot on top of and around roast.
3. In a separate bowl, mix onion mushroom soup mix and water. Then add cream of mushroom soup and mix well. Pour over roast.
4. Cook on low for 8 hours.

Free Everlast Energy Bar at GNC


Click the link below to get your printable coupon and head to GNC to get a free Everlast Energy Bar!  Unfortunately I don't have a GNC here, but I wanted to post this so that others can take advantage of it!  Expires January 31, 2010.

Tuesday, January 19, 2010

This Week's Menu - Jan 17-23


Happy Tuesday everyone! It’s actually Monday night for me since I haven’t made it to bed yet! I’ve been working on some Economics homework that’s due tomorrow night. And now I’m thinking that I’m pretty dedicated to this blog since I’m posting at 2 a.m. AND I have to work tomorrow!

I wanted to post this week’s menu so that I can hold myself accountable! It’s been working very well so far! I’m leaving Saturday night open because I’m thinking of inviting some friends over and I want to take a little more time to plan just in case! Also, I skipped yesterday because Jason had to work and Chase and Macey were with their Grandmother. Since it was just Madison and me, we ate leftover soup and cake!

Monday – Chicken and pastry*, lima beans, biscuits*
Tuesday – Meatloaf, mashed potatoes, corn
Wednesday – Chicken enchiladas* & Spanish rice*
Thursday – Country Style ribs in crock pot*, green beans, & macaroni & cheese
Friday – Hamburgers & Fries
Saturday – Lunch – Sandwiches
                 Dinner - ???

* Recipes coming soon!!!

Sunday, January 17, 2010

Rich Chocolate Icing

This cake was requested by my husband a few nights ago, and I finally had a chance to make it last night. The icing is rich…so rich in fact that it knocked me off my feet last night! It seriously did...but that’s only because I have to avoid caffeine and this icing is loaded with chocolate, which means it’s loaded with caffeine! It caused my heart to race and I went straight to bed! Yes, I knew better, but I couldn’t resist :)

My husband took the cake to work tonight and everyone enjoyed it. They really liked the icing.  It's not the smoothest icing to decorate with, but it did ok with the little bit of piping I did.

Rich Chocolate Icing

6 ounces unsweetened baking chocolate
1/2 cup butter, softened
1/2 cup Crisco shortening
1 tablespoon vanilla extract
5 cups powdered sugar, unsifted (This is equal to 2 pounds minus 2 1/2 cups OR 1 pound plus 1 ¼ cups.  If you wish to sift, do so after measuring)
1/2 cup milk  (you may need to add a little more, depending on the desired consistency)

1. In small saucepan, melt baking chocolate. Set aside to cool slightly (until it is warm)
2. In mixer bowl, mix butter and shortening until blended.
3. Pour chocolate into butter mixture and mix well.
4. Add vanilla.
5. Gradually add powdered sugar to the mixture.
6. Gradually add milk and mix well.  (You may want to alternate milk with powdered sugar because the mixture will become dry as the powdered sugar is added.)

Fun at One First Birthday Cake

I made this cake for a customer to coordinate with the “Fun at One” theme. I wasn’t sure if I was going to be able to finish this cake! I had to make it Thursday night, and my daughter had a ton of homework to catch up on that night. So, at 11 pm, I was decorating this cake and calling her spelling words out to her at the same time! I was so tired, my hand was literally shaking! Not good when you’re decorating a cake! It's not one of my best cakes, but they liked it when they picked it up Friday, and hopefully the birthday girl liked it too! That’s really all that matters!!

Friday, January 15, 2010

Seven-Layer Salad

The end of the week is almost here and I’ve only posted one recipe (well two if you include the pizza sauce)! Don’t worry…I’ve been cooking up some good stuff; I just haven’t had a chance to post! Grad school does that to me! I have some assignments that I’ve been working on this week. I started doing some research for my hospitality management class today and kept running into food, which caused me to forget what I was supposed to be searching for…event planning. Food is definitely part of it, but that’s not the part I should have been focusing on today!


Oh well, I did learn that Pastry Chef Alain Roby released a new cookbook. He is the chef at Hyatt Regency Chicago and has been featured on Food Network many times. He’s donating a portion of the proceeds to the Saving Tiny Hearts Society. His recipes are supposed to be fairly easy, but elegant at the same time. I’d love to get my hands on a copy! You can go to the website at http://www.chefroby.com/ to order the book. You can actually view 3 pages from the cookbook on that website. If you have very good eyes or a magnifying glass, you can read the recipes :)


* (I am in no way affiliated with this cookbook)

Ok, back to MY recipes! I know a lot of people are trying to eat healthy now that it’s a brand new year, so here’s a healthy recipe….a seven-layer salad! There are so many variations to this recipe and of course you can adjust it depending on what you like, but for some reason I always feel like I HAVE to have 7 layers!  Well, you'd have to change the name if there weren't 7, right!

Seven-Layer Salad

1 head of Iceberg lettuce, shredded or broken up into pieces
1 bunch of broccoli, stems removed
1/3 red onion, finely chopped (I personally don't like raw onion, but I really enjoyed the flavor this onion adds to the salad!  Probably the first time I've enjoyed eating raw onion!)
1 bag frozen peas (Remove from freezer about 10 minutes before prep) (I substituted 4 boiled eggs this time, because I did not have peas).
Bacon, fried and broken up into pieces (Or store-bought REAL bacon bits)
¼ cup mayonnaise (or light mayo)
2 tablespoons sugar
2/3 cup shredded parmesan cheese
12 ounces shredded cheddar cheese (I used mild and sharp)

1. In a 9 X 13 baking dish, layer lettuce on bottom.
2. Next, layer broccoli.
3. Layer red onion.
4. Layer peas.
5. Layer bacon.
6. Mix mayo, sugar, and parmesan cheese. Spread evenly over other layers.
7. Layer cheddar cheese on top.


Tuesday, January 12, 2010

Must-have Kitchen Gadget: The Electric Griddle

Out of all the things in my house, (besides my husband and kids of course) I really love my kitchen gadgets!  Some of them I just can't live without!  Well, there are some I COULD live without, but I just don't want to!!  I have been thinking about featuring one gadget a week on my blog, so I figured there is no better time to start than now!!  Most of my "reviews" will probably be positive ones, but I will be sure to post any negative experiences as well!

Electric Griddle

The first gadget I'm featuring is the electric griddle!  I don't know how I survived for so many years without this piece of equipment!  If you make pancakes, this is a MUST-HAVE!  You can easily fit 8 pancakes on this bad boy!  It's also wonderful for bacon, sausage, grilled sandwiches, eggs, hamburgers, hot dogs, and so much more.  Stovetop griddles can be used, but they use 2 burners.  This can be used anywhere you have an outlet!  You also have a temperature control dial on the electric griddle, which usually ranges from 100 to 450 degrees.  This griddle also features a nonstick surface which makes for easy cleanup.  Just make sure you use utensils that will not scratch the surface.  Most electric griddles feature a drain try that can easily be removed and cleaned.  The griddles come in various sizes, but the smallest I have seen will still hold 6 pancakes.  I've seen prices ranging from $17.99 and up.

The electric griddle that I own is from Cooks and I've been extremely pleased with it.  The only recommendation that I would make is to take some time to become familiar with your temperature settings.  DON'T follow the recommended settings that are included in the pamphlet because they are too hot.  My griddle was a gift, but I'm pretty sure that the price was just below $30.  It was definitely worth every penny!!

In the book, Alton Brown's Gear for Your Kitchen, Alton Brown recommends Rival and Toastmaster brands because of their accurate thermostats.


Monday, January 11, 2010

Homeade Pizza & Breadsticks!!


One of my meal projects last week was to make homemade pizza crust.  I normally use store-bought crust, but I had some bread flour on hand, so I decided to put it to use! I think my yeast had lost some of its activeness because it didn’t bubble as much as it should and of course my dough didn’t rise as much as IT should! It was still very good and I even made a batch of it for breadsticks. I will be attempting to make these breadsticks again soon with new yeast! These weren’t as soft as I like, but I’m blaming the yeast!!

And….you can’t make homemade pizza without homemade PIZZA SAUCE!! This pizza sauce is very good with just the right amount of herbs…I used it on the pizza and for dipping the breadsticks in. Yum, Yum, Yum!!!

Pizza Crust or Breadsticks (Makes 1 crust or about 10 breadsticks)

 1 (.25 ounce) package active dry yeast
1 teaspoon white sugar
1 cup warm water (110 degrees F)
2 ½ cups bread flour
2 tablespoons olive oil
1 teaspoon salt
½ teaspoon basil
½ teaspoon oregano
¼ teaspoon garlic powder
¼ teaspoon onion powder

1. Preheat oven to 450 degrees.
2. In a medium bowl, dissolve sugar in warm water. Add yeast and let stand for about 10 minutes.
3. In a small bowl, mix olive oil, salt, basil, oregano, garlic powder, and onion powder.
4. Sift flour into yeast mixture. Add oil mixture and beat until smooth. Let rest for 5 minutes.
5. Turn dough onto lightly floured surface and pat into circle. Transfer to a greased pizza pan.
6. Bake for 8 minutes. Then, remove from oven and spread with desired toppings. Return to oven for another 8-10 minutes. (This helps the crust to bake more evenly and prevents the possibility of having a gooey crust).
7. For Breadsticks, form into ball, and then roll out into sticks. Place on greased pan and bake for 12-14 minutes.

Pizza Sauce

1 (15 ounce) can tomato sauce
1 (6 ounce) can tomato paste
1 tablespoon basil
1 tablespoon oregano
1 teaspoon garlic powder

Mix all ingredients until blended well. (If you like your sauce thin as our family does, this will cover 2 pizzas).

Can you tell that I LOVE mushrooms???

This Week's Menu

Time to meal plan again! Last week went well until Saturday at lunch. The kids ended up taking lunch to school all week and used up all the bread! So, our plan for sandwiches went down the drain!! LUCKILY, Madison asked for some Ramen noodles during our last grocery store trip and we still had those on hand! This is a really good item to keep in the pantry in case of unexpected changes to your plan! And they are super cheap! You can’t beat 10 cents a pack!

Has anyone else noticed the OUTRAGEOUS price of ground beef?  While shopping for groceries, I skipped purchasing ground beef because of the high price.  It seems that this used to be one of the cheapest meats to purchase, but now it's one of the most expensive!  I guess I'm just going to have to suck it up and go by the store today and buy some.  Or I may just have to talk the kiddos out of having spaghetti and hamburger helper this week....

Anyway, hope everyone has a great week!  Here's the menu....

Sunday – Breakfast – Pancakes and Bacon
Dinner – BBQ Pork Chops, mashed potatoes, 7-layer salad
Monday – Spaghetti (Spaghetti tacos for the kids)
Tuesday – Hamburger Helper
Wednesday – Crock Pot Roast, rice, lima beans
Thursday – Cube Steak, macaroni and cheese, corn
Friday – Vegetable Beef Soup
Saturday – Leftover Vegetable Beef Soup

Saturday, January 9, 2010

More Chocolate Chip Cookies...with a little crunch this time!

Well, today was the official first day of classes for the spring semester of grad school!! I’ve been reading over the syllabus for my Economics class and trying to get back in the studying mood! I already have a homework assignment due next week! I’m already starting to stress!!! I’m also taking a Hospitality Management class (which I’m excited about), but haven’t received my info for that class yet.

The schools were on a two hour delay today because they were forecasting snow. It didn’t snow as I expected, but it was nice to sleep in a little this morning! Maybe we’ll see some snow before winter ends!


Since I totally had it together tonight, (we had eaten, kids were ready for bed, the kitchen was clean, and it was only 7 pm….GO ME!!) I decided to bake cookies. Tonight, I baked yummy chocolate chip cookies using my 2nd favorite chocolate chip cookie recipe. I shared my favorite recipe recently. It really just depends on how you like your cookies. These cookies aren’t as soft and chewy as the others…they are crunchier on the outside, but soft on the inside. The instant pudding adds a nice flavor to them.

Don't you think my husband will be delighted to come home from work to this huge plate of cookies?  Hmm...I hope so.

Chocolate Chip Cookies that Crunch

2 ¼ cups all-purpose flour
1 teaspoon baking soda
1 cup (2 sticks) butter, melted
¾ cup light brown sugar
¼ cup white sugar
1 (3.4 ounce) package instant vanilla pudding mix (I either use vanilla or French vanilla)
1 egg
1 egg yolk
1 tablespoon vanilla
2 cups semisweet chocolate chips

1. Preheat oven to 400 degrees.
2. In a medium bowl, sift flour and baking soda. Set aside.
3. In a large bowl, cream together butter, brown sugar, and white sugar.
4. Beat in instant pudding mix.
5. Beat in eggs and vanilla.
6. Add flour mixture and stir well.
7. Stir in chocolate chips and drop dough onto cookie sheet lined with parchment paper. (Or ungreased cookie sheet if you don’t have parchment paper).
8. Bake for 8-10 minutes in preheated oven.

By the way, Macey usually helps me when I bake cookies. She BEGS to help me in the kitchen. I have to say no when I’m baking for a customer, but I let her help when we are eating it! Her favorite job is sifting flour! She wanted to pose with the cookie dough tonight!! :)

...And she insisted that I take a close-up shot of her hands holding some of the dough!  She has been watching me way too much...she's going to be a food blogger when she grows up :)


Thursday, January 7, 2010

Paula Deen's Sour Cream Biscuits: Don't try these at home!

Most of the time, I can look at a recipe and determine whether it's going to be good or not. And if it isn't, then I usually know how to tweak it next time so that it will be good. But, I’m sorry; I don’t think tweaking is going to mend this recipe! I think I’ll just stick to using my Grandma’s simple biscuit recipe!

Let me add that I LOVE Paula Deen. She’s amazing and I have tried several of her recipes and they were delicious. By watching her shows, I have picked up a few of her tips and ideas that have been very helpful to me in the kitchen. I found this recipe in the book, Christmas with Paula Deen.

The recipe is simple: 2 cups self-rising flour, 1 cup sour cream, and 1 cup butter. It’s really gooey once it’s mixed, more like cookies than biscuits. My youngest daughter, Macey, said it looked like chicken salad! She was right…it did!

First of all, the suggested temperature of 400 degrees was too hot. They were barely cooking on the inside after 8 minutes. And it was recommended to bake them for 8-10 minutes. So, I dropped the temperature to 350 degrees and kept baking. I took them out after about 12 minutes. I tasted them while they were hot…BIG MISTAKE! They were disgusting! So, I let them cool and they were better, but still not good. I ate 2 or 3….mainly because I was trying to figure out what they tasted like! Chase and Macey tasted them and spit them out! My husband and Madison wouldn't even try them.


Then, I decided to add shredded cheddar cheese to the remaining dough, thinking there may be hope! I baked those and let them cool before tasting…They were…well, a little cheesier tasting, but still BLAH!! I am now forcing myself to eat these dry floury tasting balls because I ended up with about 30 of them and I HATE to waste ingredients! I just have to remember to have something to drink nearby to get these things down...they kind of tend to get stuck in my throat!  Hmmm...I may end up using them in place of bread crumbs in meatloaf next week. Any more ideas?


Sour Cream Pork Chops

I love sour cream!  I mean I REALLY LOVE sour cream!!  It's what makes some of my cakes moist, my cornbread soft, my tacos tasty, and now my pork chops delicious!  I found this recipe and just had to try it!  Along with some biscuits that I'll post about later (a disappointing experience).  But, anyway, here's the recipe and it was especially great because it involved the crock pot!  There is nothing better than coming home from a tiring day of work to the smell of dinner cooking.  Whoever invented the crock pot was a genius! 

Sour Cream Pork Chops

6-8 boneless pork chops (best if they are at least one inch thick)
2 chicken bouillon cubes
2 cups water
1 tablespoon Creole seasoning
1 teaspoon salt
2 teaspoons pepper
1/2 cup sour cream
1/8 cup all-purpose flour, sifted

1. Place pork chops in crock pot on lowest setting (mine was set on Low – 10 hours).
2. Bring 2 cups water to boil. Add chicken bouillon cubes and stir until melted. Remove from heat and pour over pork chops.
3. Add Creole seasoning, salt, and pepper and stir until pork chops are mostly covered by liquid.
4. After about 7-8 hours, turn oven on to about 150 degrees. Remove pork chops from crock pot, put in a baking dish, and place in oven. (This is just to keep pork chops warm. They should be pretty tender at this point. Most of mine fell apart when attempting to move them to the baking dish, so be careful).
5. Turn crock pot onto highest setting (I set mine on High – 4 hours). Add sour cream and flour to the liquid remaining in the crock pot. Stir well (I used whisk) and let simmer for about 30 minutes. (This is when I prepared my side dishes – rice and corn).
6. When serving, just spoon sour cream “gravy” onto pork chops. If your pork is falling apart too much, you can just put pork back into the crock pot with the gravy. It’s not as pretty, but it’s perfect over rice or potatoes.

Tips:

1. You may need to add more salt and pepper if you omit the Creole seasoning. You may have noticed that I use this seasoning in a LOT of dishes, and the Creole seasoning I use also contains salt and pepper.  (It also contains red pepper, garlic, and probably a few other spices).
2. After I made the gravy, I was afraid I didn’t have enough, so I added 2 cups of chicken broth, ½ cup sour cream, and ¼ cup flour and mixed well. Perfect!

Tuesday, January 5, 2010

Planning Ahead and Saving Money!

School’s back in and we are trying to get back into the same old routine. I thoroughly enjoyed staying home with the kids during the holidays (and my husband when he was off). I finally felt like I had it together! Now, I’m looking forward to the summer break!

I planned our meals for the week and I am saving so much money by doing that. I used to stop by the grocery store every day when I got out of school. I would spend $20 or $30 a day! It was getting totally ridiculous! Now, I’m only shopping on the weekend, after my meals are planned for the next week.

When I picked the kids up yesterday, Chase asked if we were going to the grocery store. I proudly said “Nope! There will be no more after-school grocery store trips! Grocery shopping will be done only on the weekend!” Then he asked if we could have Hamburger Helper for supper. Again, my reply was “Nope.” I told him he’d have to put in a request for next week since this week’s meals are already planned :)

I know I'm already a couple of days into the week, but here's this week's menu:

Sunday – Roasted 2 chickens. (We ate part of one that night and put leftovers in the fridge).
Monday – Chicken Pot Pie (made with leftover chicken)
Tuesday – Spaghetti and Garlic Bread
Wednesday – Sour Cream Pork Chops, rice, green beans.
Thursday – Pizza (I’m making homemade crust for the first time). I’m also making homemade hot dog buns for Friday night.
Friday – Hot Dogs (homemade hot dog buns) and fries made from fresh cut potatoes.
Saturday – Breakfast: Pancakes (and sausage if I can get around to making some before Saturday).
Lunch: Sandwiches
Dinner: Fish (spots that we have in freezer) and fries made from fresh cut potatoes.

Saturday, January 2, 2010

Little Prince Birthday Cake

I mentioned before that I run a little cake business out of my home.  I occasionally get an order for a decorated cake.  I enjoy decorating cakes, but it's very time consuming because it takes so much time to clean the mess.  Today I had blue, black, and yellow icing all over my kitchen cabinets, the floor, and me (mostly me)!!  This cake is for Gabriel's first birthday!  The cake on top is a 1/4 sheet cake and the bottom cake is a 6" round, just for the birthday boy!  I hope he enjoys his little cake!


These are the party supplies for the Little Prince:


Quick and Easy Chili

Happy New Year!!!  I hope 2010 is a great fantastic year for everyone!!  It seems like everyone is making their new year's resolutions.  I've never been that crazy about making resolutions. I think it's because I feel guilty when I make a resolution and don't follow through with it!  I've had "work out and get in shape" on my list for years, and it works for a while, but then I gradually quit!  It's not because I don't like to work out, I just get tired of trying to fit one more thing into my already busy schedule!  I'll keep it on my list this year, but I can't make any promises! 

There is one resolution that I'd like to make this year that I really think I can follow through with!  Since I haven't been blogging long and I have tons of recipes that I want to post, my resolution is to post 150 recipes this year.  That's about 3 a week, so I think it's manageable! 

The first recipe I'll post for the new year is one I tried on New Year's Eve.  It's also the first time I've ever made chili!  It was really good.  My husband said he liked more "stuff" in his chili, but he said it was still good.  This chili was quick and easy, so I'll definitely be making it again!

Quick and Easy Chili

2 pounds ground beef
1 onion, chopped
2 teaspoons black pepper
2 teaspoons garlic powder
24 ounces tomato sauce
8 ounces salsa
2 packets of chili seasoning mix (I used original, but will probably use 1 hot and 1 original next time for more heat)
1 (16 ounce) can light red kidney beans
1 (16 ounce) can dark red kidney beans
1 (14.5 ounce) can diced tomatoes (I used Zesty Chili Style)
1 cup water

1.  In large skillet, combine ground beef, chopped onion, black pepper, and garlic powder.  Cook on medium-high heat until ground beef is brown.
2.  In large pot, combine beef mixture and all other ingredients.  Bring to a boil.
3.  Reduce heat and simmer for about one hour.

LinkWithin

Related Posts with Thumbnails